One of the things that Jo and I wanted to do with Ziggy was to not be reliant on a car – so I cooked up the plan, sold my old triathlon training bikes, and bought a couple of E-Bikes .
But, as the more observant may have noticed, Ziggy doesn’t have a bike rack fitted… and the garage would not take a couple of adult bikes either.
So, I started researching and thanks to a lovely lady called Daniele from Laika Customer services, I found out that the original Kreos 3010 was fitted with a Fiamma Carry Bike L80.
(I did get a quote from a – unspecified Laika dealer for one but at £750 I paled – but https://everythingfiamma.co.uk/ had the correct unit for £280 including delivery).
But what about the fitting – well, I did get several quotes for that – all agreeing on 4 hours labour – the quotes ranged from £80 an hour to £120 per hour plus VAT.
So I sat down and read the instructions – and one thing leapt out at me:
The actual space that the frame could be fitted in was very small – and using google, I had sourced a very grainy image of where the rack had been factory fitted:
So, Like Sherlock with a bad hang over – the games afoot I thought.
First thing I did was to wipe clean and then apply broad masking tape to the rear of Ziggy:
And I nearly made a terrible error here – I thought that the rear window is central – a Quick Look makes you think that – but it isn’t – there is an offset for the ladder!
Having kicked myself, I measured up and then laid down a central line – using a spirit level to make sure Ziggy was parked level, and then using a plumb line to get a straight reference point.

From this, its quite straight forward – we know that the rack is set 40cm on each side from the central point – so using a bit of geometry I was then able to mark up the centre points of the upper pivot mounts – Initially I came too low – I offered a complete side bar up to where I initially thought but then realised that there was no way the rack would fit in the gap – that’s why you can see two marks – the upper ones were correct and drilled:
I drilled through – having already taken the mattress off inside – and I will admit that a small amount of nervous wee may have escaped….
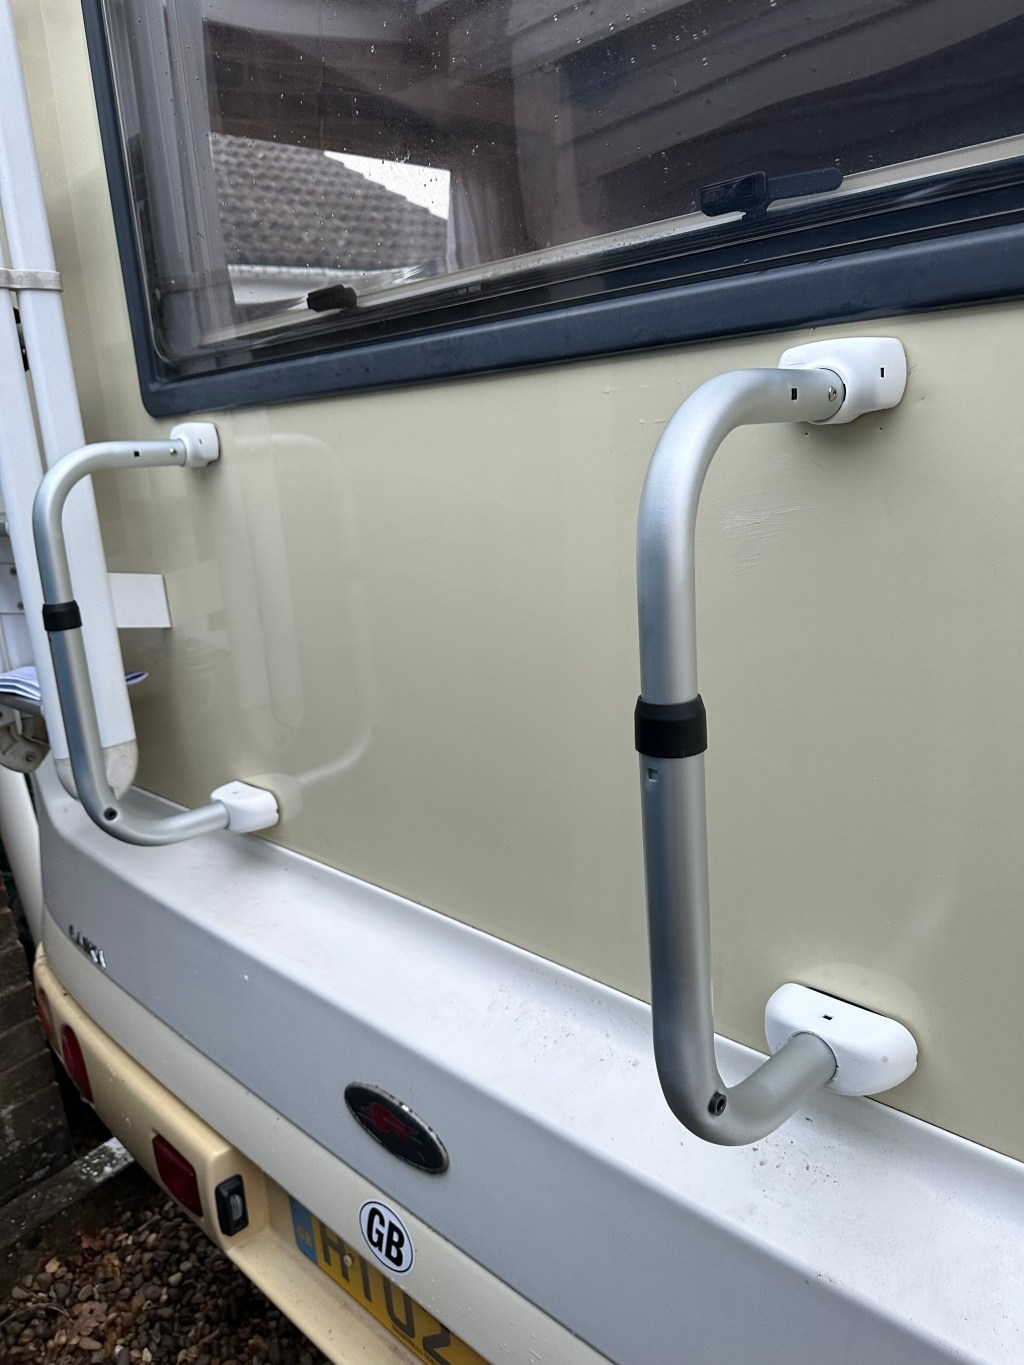
The supplied Coach Bolts were a tad too long for my liking so Mr Dremel came to visit and then the covers were applied – a nice neat finish I think.
Once all the brackets were attached, It was then a process of assembly putting the two side rails on and bolting down the bars – the covers simply clipping over the top, and being integral at the bottom:
So – that was it – the rack is now fully fitted – excuse the poor light in the last one – but it was getting dark!
All Told it took me around 6 hours – but, as its not in my comfort zone, I am quite happy with that 🙂
Once I get some nicer weather, I will post images up of the rack in use, and the cover fitted – and also share my personal approach to security involving electrical terminals and gin traps… I don’t like tea leaves!


Leave a comment